October 20, 2013

Luca Bear Baby Sweaters

Luca Bear's First Hand Knit Sweater

Exciting news! We're having a baby! We are expecting Luca Bear (that's his name...well, his actual middle name is Herbert, after a family member, but we call him Luca Bear) in early January of 2014. As soon as we knew he was a "he", I began knitting and crocheting!

I've only knit one sweater before, and that was for me. My sweater was made using a custom pattern that I created by taking various measurements of my body. Since I can't do that with Luca Bear, I searched for a simple, yet attractive, pattern that wasn't too complicated. Finding one that was knit on circular needles proved very hard to find.

I ended up using a pattern in Natural Nursery Knits by Erika Knight. I highly recommend this book and this pattern. The sweater is knit in sections. First you knit the back section; then the front section; and then the sleeves. Once they are complete you stitch the pieces together using a tapestry needle. To make the collar, you pick up stitches and knit back and forth for a few rows. That's it! Sounds a little easier in my summary than it actually was.

Once you get the hang of the pattern I'm sure you will want to knit another one. I've already begun Luca's second hand knit sweater. This time I'm mixing colors. So far, the second time around is much easier since I already have knowledge of how the pattern works and how the separately knit pieces fit together.


The beginning of the Back Panel of Luca Bear's Second Hand Knit Sweater.

March 24, 2013

Afternoon Tea Biscuits


I love afternoon tea. I took a basic drop biscuit recipe and made it a bit more special by adding dried rosemary and mint leaves.

1 2/3 cup unbleached all purpose flour
1 tablespoon baking powder
1/2 teaspoon salt
2/3 cup vanilla almond milk
1/3 cup canola oil
1 1/2 tablespoons dried mint leaves
1 1/2 tablespoons dried rosemary leaves

Preheat oven to 475 degrees fahrenheit
Lightly grease a cookie sheet

In large bowl, combine flour, baking powder, salt, mint and rosemary. Add almond milk and oil and stir until combined. Make dough into golf ball sized balls and place on cookie sheet. Bake for 8 minutes.


These biscuits are delicious when served with white tea.

March 23, 2013

Tea & Scones


I made really delicious scones this morning. They were a total experiment. I am making an effort to eliminate processed sugar from my diet, and so I used honey in these instead of white sugar. I can hear the questions...honey? That's not vegan! No, technically it is not. After weighing the pros and cons I made the personal choice that the health benefits of local honey are numerous and I will keep it in my diet. There are two local beekeepers within 10 miles of my home.

Here is my recipe:

1 1/2 teaspoons Ener-G Egg Replacer
2 tablespoons water
2 1/2 cups unbleached all-purpose flour
4 teaspoons baking powder
1/2 teaspoon salt...or 1/4 if you want them to be less salty
pinch of baking soda
3/4 cup nondairy butter, cold

1/2 cup almond milk
1/4 cup local honey (dissolved into almond milk)

2 to 3 tablespoons almond milk (for brushing the tops of scones)
cinnamon (for sprinkling on top of scones)

Preheat oven to 400 degrees fahrenheit
Lightly oil a cookie sheet

In a food processor blend water and Ener-G Egg Replacer until thick and creamy. Set aside.

In a large bowl combine flour, baking soda, baking powder, and salt. Add the butter to the dry ingredients and use a pastry cutter or large fork to cut the butter into the flour. You should have a crumbly flour and butter mixture. (if you want to jazz up the recipe with dried fruit you can add those at this stage.

Add the milk and honey mixture and the egg replacer mixture and mix until just combined. Do not over mix. It will make your scones tough. Once the dough starts to come together, place on a lightly floured surface and work into two logs. Flatten the logs and cut into triangle shapes with a butter knife.

Place on the prepared cookie sheet and brush on a small amount of almond milk quickly followed by a sprinkling of cinnamon.

Bake for 12-15 minutes. Let cook on a wire rack.

March 14, 2013

Sweater Knitting

I am very excited to show you my first ever handknit sweater! Well, the start of it. A couple of my work friends and myself signed up for a beginner's sweater knitting class at our local yarn shop, Fiber Arts Cafe. I use "local" loosely in this context. I live about 20 minutes from this shop and one of my work friends lives about 45 minutes away. We decided to go to this shop because it is a hop, skip and a jump from our work.

For my sweater I choose a green yarn that has flecks of blue. The yarn is made by Plymouth Yarn. It is their Encore Chunky. I am using US size 10 circular needles. I casted on the neck with a 16" cable and proceeded to a 29" needle.

The pattern is "The Incredible, Custom-fit Raglan Sweater. You can keep up with the progress of my sweater by visiting my Ravelry page: PamieA on Ravelry

March 2, 2013

Winery Adventures


Have I mentioned that I've recently become totally into wine? I love having a glass (or two) with dinner. Luke and I visited a local winery this morning (Heritage Vineyards Winery). We've always admired the grapes that were growing in the fields all through Mullica Hill, but never visited this little gem of a shop. 

We left with a Jersey Moscato. It is described as: "Peach-scented and honey-suckle aromas with fresh, sweet flavors of juicy stone fruit, honeydew melon, Fuji apple and ripe pears. This wine is beautifully balanced with crisp acidity and a clean finish." We bought a bottle of Cuvee Blanc as a gift. Cuvee Blanc is a mix of Chardonnay, Pinot Gris, Semillon, and Sauvignon Blanc. It is described as: "Aromas of citrus, melon and rip pineapple; flavors of ripe apple, lemon custard and freshly baked sugar cookies; beautifully balanced acidity focuses a long, rich finish."


The winery is family owned by Bill and Penny Heritage. When we walked in, Penny gave us a warm greeting. The shop contains tables and shelves of wine-related items, such as felted wine bottle cozies, wine racks, and grapeseed lip balm. They also have a variety of foods, such as pastries, cheese, and locally made honey (from one of our other favorite family-owned shops, Fruitwood Orchards). They have a wine tasting bar where you can sample before you purchase. The tasting fee is $5 for samples of 5 different wines that you choose from a list of 18. It was 10am when we arrived so we did not do a tasting. 

An added bonus to this already fantastic place is that they have a cow, sheep, goats and chickens out back! This totally MADE my day!
This is Samson! He is GIGANTIC but so sweet. He LOVES having the top of his head rubbed. 


The goat COULD  NOT get enough attention! The brown sheep kept licking my hand with his/her warm tongue but DID NOT want me to pet him/her.  The other sheep was the same way. 

These chickens made the most lovely chirping sound when I crouched down to talk to them. 

February 24, 2013

Filled Pancakes


Before I was vegan, I made these awesome pancake-like things called Ebelskivers. I've missed them so much so I decided to pair my vegan pancake recipe with the Ebelskiver technique. The main difference is the texture. Ebelskivers have a very pastry-like quality while these are more like pancakes. I think they are just as good. They taste great served warm or cold. When eaten cold they are very similar to donuts!

I varied the filling in this batch: strawberry jelly, crunchy peanut butter, and chocolate peanut butter.

The secret to these filled pancakes is the pan used to make them. The one I have was a wedding gift. If you want to try Ebelskivers or my version you can buy the pan at Williams Sonoma.

Pam's (vegan) Pancakes

1 teaspoon vanilla
1 egg replacer (I use Ener-G)
1 cup almond milk
2 tablespoons vegetable oil
1 cup all purpose flour
2 teaspoons baking powder
1/2 teaspoon salt
3 tablespoon sugar

  • Mix wet ingredients in a medium bowl. (Follow the directions on the Ener-G box.  The Ener-G powder, combined with the water goes into this wet ingredients combination.
  • Mix dry ingredients in a large bowl.
  • Make a well in the center of the dry ingredients and slowly pour in the wet ingredients and stir with a whisk until smooth.
  • To make the pancakes- make sure the pan is warm (medium heat setting). Brush the hollows of the pan with melted Earth Balance.
  • Spoon a tablespoon of batter into each hollow. Immediately spoon 1/2 teaspoon of filling on top. Then put just enough batter on top of the filling to encapsulate the filling (about a tablespoon) 
  • Once the batter puffs up, has bubbles, and looks dry on the sides, use chopsticks to rotate the pancake so the top is now on the bottom and in the hollow. William Sonoma's website has a video on how to turn the pancakes. 

I have seen vegan Ebelskiver recipes on the internet but have not tried them. If you find one that you like please share!

Pin It


February 22, 2013

Stereo Gals

Some nights I love having a girl-night (sewing tea towels, printing, browsing blogs by candlelight-like tonight, yarning, etc.) with the sounds of my favorite female musicians. Here are some of my favorites:

Ingrid Michaelson, Be Ok

Sara Bareilles, Little Voice


Kate Nash, Made of Bricks
Feist, The Reminder

Regina Spektor, Far
Yael Naim, Yael Naim

New Prints


We've become a bit of a block printing home this past month. I've been carving a lot of linoleum for printing on fabric and Luke has completely immersed himself in wood block carving. He bought these really great wood carving tools from (insert link to online store). They are handmade in Japan and are gorgeous.

I love the look of a wood carved block but (for now) I like the process of carving linoleum better than wood. There was definitely a learning curve that Luke experienced. It seems you have to be so sensitive and aware of the wood grain in relation to this design you want to pull out of it. Very cool process, but no thanks. I'll stick to lino for now.

Here is what I've been working on:


This block has only been printed on paper but I will soon make tea towels for this block to be printed on. The towels will be for sale in my Esty shop (PamsSoapStudio.etsy.com) by mid-March.

February 12, 2013

Seed Swap


It's that time of year again when we begin to lay out the seed packets and plan the gardens. My inspiration for our gardens comes from the English Cottage Country style. I absolutely love the organized chaos it embodies.

We have two main edible gardens:

1. A vegetable garden with raised, wooden beds that is fenced in with wooden pickets and lined with an assortment of herbs and perennial flowers.

2. An herb garden that is divided into three, one-third-of-a-pie shapes that have a mix of annual and perennial herbs.

There is of course the assortment of flowering bushes throughout the yard as well as 6 blueberry bushes.


Not only am I lucky to have a husband that likes to garden from seed, I ALSO have friends that like to as well! This past weekend my friend, Lauren, came to visit and we had a morning seed swap over coffee and ginger muffins (recipe at the end)!


It is so easy to go overboard when ordering seeds. Depending on what you order, the seed packets can have anywhere from 20 - 100 seeds in them. If you're like me/us and you order 10-20 types of seeds, that equals way more plants than you have the space to grow. That is where the beauty of the seed swap comes in. Both individuals can order a variety and then share a few seeds of this and a few seeds of that. Seeds usually last one to two years...sometimes a little longer...depending on the variety, but I like to plant seeds that are no more than one to two years old.

Cigar box that I use to store my seeds packets


Ginger Muffins

2 Tablespoon Ground Flaxseeds (I use a small coffee grinder to grind them into a powder)
6 Tablespoons water
1/4 cup finely minced fresh ginger (peel removed)
1 cup granulated sugar, divided
zest from one lemon
2 cups unbleached all-purpose flour
3/4 teaspoon salt
1 teaspoon baking soda
1/2 cup nondairy, butter (I use the Earth Balance brand)
1 cup soy milk
juice from 1 lemon
Preheat oven to 375. Grease muffin tins.
In a food processor, blend the ground flaxseed and water together until it reaches a thick, creamy consistency.
In a small saucepan, combine the ginger, 1/2 cup sugar and cook over medium heat, stirring until the sugar melts and is thoroughly combined with the ginger. This takes only a few minutes. Set aside to cool and then add the lemon zest.
In a medium bowl, combine the flour, salt and baking soda. Set aside.
In a large bowl, using a hand-held electric mixer, beat the non-dairy butter until smooth. Add the remaining 1/2 cup sugar and beat until combined. Add the flax mixture and mix until combined. Add the milk and lemon juice until combined. Add the combined dry ingredients and ginger-sugar mixture and stir just until blended.
Spoon into tins and bake for about 20 minutes.

February 10, 2013

IKEA


I was super excited all week because my friend Lauren was coming to visit on Saturday (yesterday)! We sampled ALL the rooms in IKEA (pretended to have meetings in office spaces and sampled bedrooms), ate delicious Indian food at Coriander, drank bellinis and watched a girl-movie at night. 


One of my favorite things about IKEA is that it is full of inspiration for living spaces. I saw these great, but simple idea boards in a room that was staged as a creative space. Very simple pin boards screwed to the wall, and each used as a collection of ideas for different projects. I absolutely want something like this for my studio space.


We have this coffee table in our living room! I love what they did with paper hearts! MUST do something like this for Valentine's day. I could step it up a notch by using stitched fabric hearts or prints of hearts to make it a bit more rustic.


February 3, 2013

Flavors of Morocco

I never considered myself a foodie nor did I set out to be one. However, I think I have become one! I LOVE food! Not in the overindulgence way but in the savoring-every-morsel type of way. I love to experience other cultures through their food. Ideally, I would love to travel all over the world to sample food but since I can't do that I settle for local ethnic restaurants and trying to cook the recipes in our kitchen. 


For Valentine's Day mom bought Luke and me a tagine! "Tagine" is both the term used to describe an earthenware cooking pot and also the food made within the pot. The moroccan "tagine" dish, is a slowly braised stew. Traditionally, meats are cooked in the tagine but since we are vegetarians and vegans in this home I found a great vegetable tagine recipe.

Moroccan-Inspired Bowls
 My mom is so adorable. When she gives a gift she goes for the set. To compliment the tagine she gave us a set of Moroccan bowls.


Vegetable Tagine
from Williams Sonoma 
4 1/2 cups spiced tomato and herb braising sauce
3 1/2 pounds of trimmed vegetables (such as onions, yukon gold potatoes, baby carrots, cauliflower, fennel bulbs, and turnips)
1/2 cup cooked chickpeas
1/4 cup raisins
1 preserved lemon, pulp removed, rind thinly sliced
Sea salt for sprinkling

In saucepan over medium heat, simmer braising sauce, stirring often to prevent scorching, until reduced by one-fourth. 20-30 minutes. Remove from heat.

Position rack in bottom of oven; remove other racks. Preheat oven to 325 degrees Fahrenheit.

Layer vegetables in tagine, starting with onions and placing larger vegetables toward the bottom. Add chickpeas and raisins in the middle. As you layer, shape vegetables into a mound, making sure the lid fits securely without touching the vegetables. End with smallest vegetable pieces.

Pour braising sauce over vegetables. Place in oven and cook for a little over one hour.

January 30, 2013

Lentil & Kidney Bean Stew


This is one of our favorite cold-weather foods. It is total comfort food! What makes this recipe even better? It is cooked in a crock pot! It only takes about 15 minutes to prepare the ingredients. Once the ingredients are in the crock pot, you can turn it on, and forget about it for 6 hours. I typically make this on the weekend and eat it as a meal or as a side throughout the week.

If you love mushrooms (like I do!), the stew can be enhanced by adding additional ingredients after it's finished cooking. One of my favorite things to add is lightly sauteed rosemary mushrooms.

Ingredients
2 tablespoons of Olive Oil
1 large red onion, coarsely chopped
1 pound bag of lentils
2 cans kidney beans (or you can cook dry ones)
4 cups vegetable stock
2 cups water
2 teaspoon dried bay leaves
1 teaspoon dried marjoram leaves
sea salt & freshly cracked pepper
1 teaspoon ground cumin
3 Serrano chiles sliced, more if you like a lot of heat

Saute onions in a skillet with olive oil until they soften. Meanwhile, add all other ingredients to the crock pot. Add onions. Cook on low heat for 6 hours.

If you love mushrooms like I do, just before the stew is ready heat a teaspoon of olive oil in a pan. Saute mushrooms with 1 teaspoon dried rosemary, fresh cracked pepper and a pinch of sea salt. Saute only long enough for the mushrooms to absorb the oil (about 1 minute 30 seconds). I like them to be softened, but still a little firm.


January 25, 2013

Reimagining Printmaking


I've always been drawn to a creative process that resulted in the production of a three dimensional object. For the longest tmie, ceramics was my favorite process. I loved throwing sections of large, womanly-shaped vases on the wheel and then stacking the sections to create two-three foot objects. Once college and post-college studio spaces became either unavailable or inconvenient, I began searching for new creative processes.

Printmaking was one process that caught my eye. Luke (my husband) is a printmaker so I had a live-in teacher. He mainly works with screen printing but I knew that wasn't for me. I was drawn to relief prints. Not so much the finished product, but rather the carving process. I found it to have many similiarities to the ceramic process. I jumped in, swam around for a while and then jumped out. It really wasn't holding my attention. A year or so later I decided to combine my mild interest in sewing with my mild interest in printmaking and BAM! A full blown interest in the combination of the two! I now pine all day to sew and print in the studio.


My print designs are inspired by my love of all things natural. A side note here: in a world of processed food and processed-everything, I think it is so important to value, treasure and highlight the handmade and natural. My (as close to as I can get) all-natural philosophy motivated me to start my own handmade soap company. The ingredients I use to create the items for my business inspire my printmaking.


I am currently working on this really great ginger lino-cut. It is the most tedious block I have carved. My style is typically contour-line based but this block calls for textures within the lines. I am so excited to see the final print! Just like the flower bouquet print above, this ginger will also find its way onto a towel. A few weeks ago, I made a ginger soap that I think will compliment this print beautifully.
As always, my soaps and towels can be purchased in my Etsy shop: PamsSoapStudio.etsy.com


January 20, 2013

Sunday Antiquing


There is a really great street lined with antique stores a couple towns over. I've had my eye on the south-jersey green mason jars for a while and today I finally purchased one. This one has a glass lid! According to a few online articles, this type of closure is called a bail closure. According to the docents at my work, the color of this jar is caused by the iron found naturally in the sand of south jersey. Glassblowers would have to add manganese to the furnace glass to change the color to clear. I LOVE the natural south jersey green! 


In addition to visiting the antique shops, I tested and listed my shampoo spheres on my Etsy shop!

PamsSoapStudio.etsy.com

January 16, 2013

Do You Love Cubbies?


Do you LOVE cubbies? I do. I totally do. I can never have enough storage space. Even if there is nothing to store at the moment....there will be....eventually. That is why I bought these fantastic cubby-shelves at IKEA this past weekend. They are a high gloss gray that look great against the light gray and dusty rose walls of our studio. This purchase was inspired by a book I recently bought titled Where Women Create. It is mostly a picture book of women's creative spaces. What I love about it the most is that all the spaces featured use a combination of old and new pieces (shelves, chairs, decor) to organize materials, tools and items of inspiration. I have no shortage of all three.

My New Favorite Book...for the week.
After spending the previous weekend re-organizing my materials I was able to condense my storage system. So, when I brought in these shelves I realized I have more room than I need. A GREAT problem to have. Re-organizing a creative space can be so inspiring. When I have a clean and organized work space I feel more inclined to create. 

My charcoal gray shelf fits perfectly in the line up! 

NEW ITEMS IN THE SOAP STUDIO!


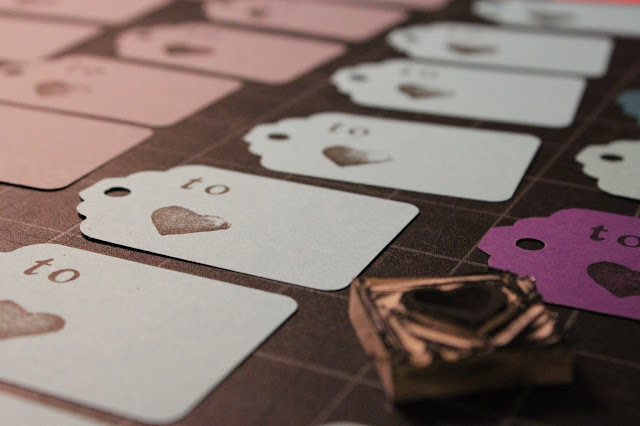
Everyone has loved my gift wrapping I use on my soaps, so I've decided to make the service and the tags items in my Etsy shop!